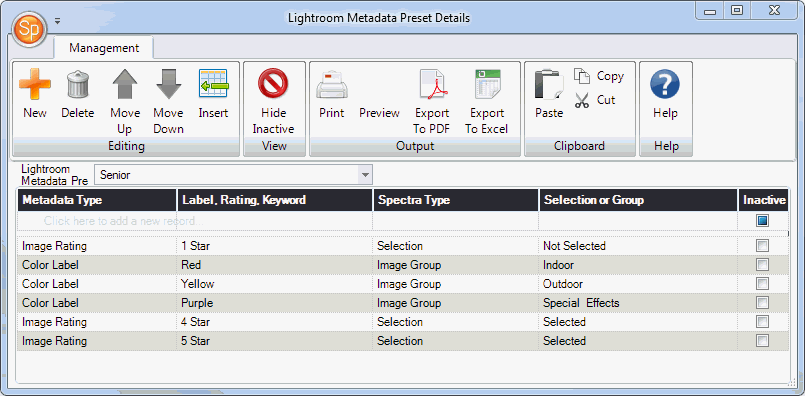
Note: Before defining your Lightroom Metadata Preset Details, make sure you've created one or more preset names in Maintenance > Digital > Lightroom Metadata Presets.
Defining the preset details is basically setting up a table that contains rules that let Spectra know what a Lightroom rating, color label, or keyword should "equal" in Spectra. Examples include:
An image with a rating of no stars in Lightroom should be marked as "Not Selected" in Spectra.
An image with a four star rating in Lightroom should be marked as "Selected" in Spectra.
An image with a red color label in Lightroom should be put in an image group called "Outdoor."
An image with a yellow color label in Lightroom should be put in an image group called "Special Effects."
and so on...
When you're ready to define the preset details, open Maintenance > Digital > Lightroom Metadata Preset Details.
Select a Lightroom Metadata Preset from the drop-down list.
To add a detail line, click once in the blank row or click New on the ribbon.
In the first column, select a Metadata Type. These are items that have been assigned in Lightroom, including Color Label, Image Rating, and Keyword.
In the second column, enter or type the Lightroom selection that you will be defining for Spectra. Note: When typing in color labels or keywords, make sure to type it in exactly as it appears in Lightroom, including capitalization.
In the third column, select whether metadata of this type will translate to a Selection or an Image Group in Spectra.
Finally, in the fourth column, enter or select the specific selection rating or image group.

Lightroom Metadata Preset Details